
Elements - System Administrator and User Guide - Hosted
Promises Tab
| End-User Guide > Workspace > Loan Maintenance > Promises Tab |
While working on a loan, a user can take a Promise to Pay from the account holder and record it within the workspace. A Promise to Pay is a promise an account holder makes to the financial institution that they will pay a certain amount on a delinquent loan by a certain date in an effort to bring the loan current.
Promises are recorded and tracked on the Promises tab in the workspace. On this tab, users can create, edit and cancel promises.
 |
Access to this tab and the functions contained within are controlled by administrator-defined Security Profiles. |

|
All promises that are due today and tomorrow in worklists assigned to a user appear on the user's Elements home dashboard. |
To create a new promise on a loan, ensure that the desired loan is selected in the loan grid and navigate to the Promises tab. All existing promises for the loan are displayed in reverse chronological order. The total number of outstanding promises for the loan are displayed in brackets on the tab.
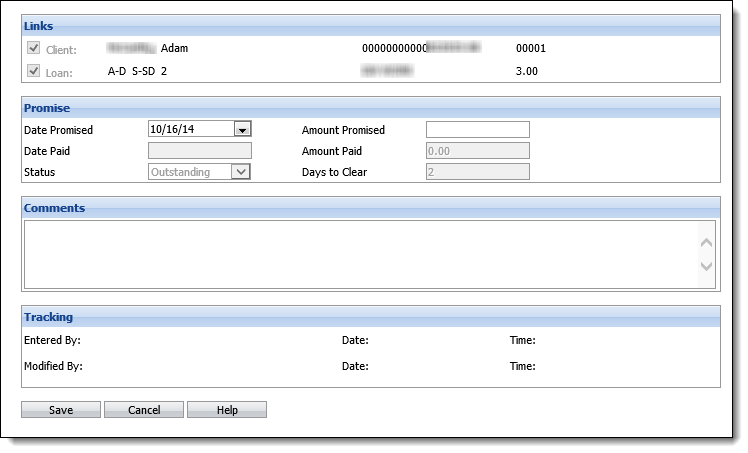
Click  on the Promises tab. The Promise Detail window appears. The promise is automatically linked to the client and the loan highlighted in the loan grid. These links cannot be broken.
Enter the date for which the funds have been promised, the amount promised and any comment about the promise. All other fields are read-only and are set by the Download.
Click Save to save the promise. Click Cancel to disregard creating the promise.
Upon clicking Save, the promise appears on the Promises tab of the workspace. If an administrator has enabled the Auto Follow-up note for Promise Entered in System Management > Collection > Auto Notes, a follow-up note is added to the Action tab using the specified call type. The default number of days associated with the call type code is ignored.
If a client promises to pay a specific amount and requests that the amount be split between two or more loans, a separate promise needs to be created to apply against each loan. For example, a client promises a payment of $750 to apply to his mortgage and to his credit card loans. He wants to apply $700 to his mortgage and $50 to his credit card. To do this, highlight the mortgage loan on the loan grid and create a promise for $700 and then highlight the credit card on the loan grid and create another promise for $50. When the payment is posted in the core banking system, each payment also needs to be split between the two accounts. When the download is run, the funds are applied to each account accordingly and the promises are marked as kept.
To edit an existing promise on a loan, ensure that the desired loan is selected in the loan grid and click the Promises tab. Highlight the desired promise to edit and click  .
.
The Promise Detail window appears. Only the Comment field can be changed. When finished editing the comment, click Save. Click Cancel to disregard any changes.
|
Promises to pay cannot be deleted, but they can be cancelled. |
To cancel an existing promise on a loan, ensure that the desired loan is selected in the Loan Grid and click the Promises tab. Highlight the desired promise to cancel and click . The Promise Detail window appears. Select Cancelled from the Status drop-down.

When finished, click Save. Click Cancel to disregard cancelling the promise.
Upon clicking Save, the Status is changed to Cancelled on the Promises tab of the workspace.
If a system administrator has enabled the Auto Follow-up note for Promise Cancelled in System Management > Collection > Auto Notes, a follow-up note is added to the loan using the specified call type. If there are other outstanding promises to pay for the same loan, the follow-up date is adjusted to the day after the oldest promise is due. If there are no other outstanding promises to pay, the follow-up date is not changed.
For details on how a promise is tracked within Elements, please see the Tracking Promises to Pay topic of this guide.